IFS User Guide

by Paul Eldrid OneSails Australia

Congratulations on purchasing your new OneSails IFS Cable-less furling sail. These sails have been designed and built to the highest standards to ensure ease of use and exceptional performance. There are some key points that will make the use of your new sail pleasurable, so be sure to peruse this document carefully to ensure you get the most from your new sail.

The Package

You will notice that your new IFS is stored in a custom bag with a zip. The long bag makes handling the sail much easier in getting in and out of the companion way and hatches. It also lends itself to the most efficient way of preparing the sail for use and also packing it away.

Upon undoing the ties and unzipping the bag you will see the sail is furled up and ‘snaked’ into the bag. The three corners are defined by the Head Swivel (head), Furling Drum (tack) and the Clew Leash (clew).

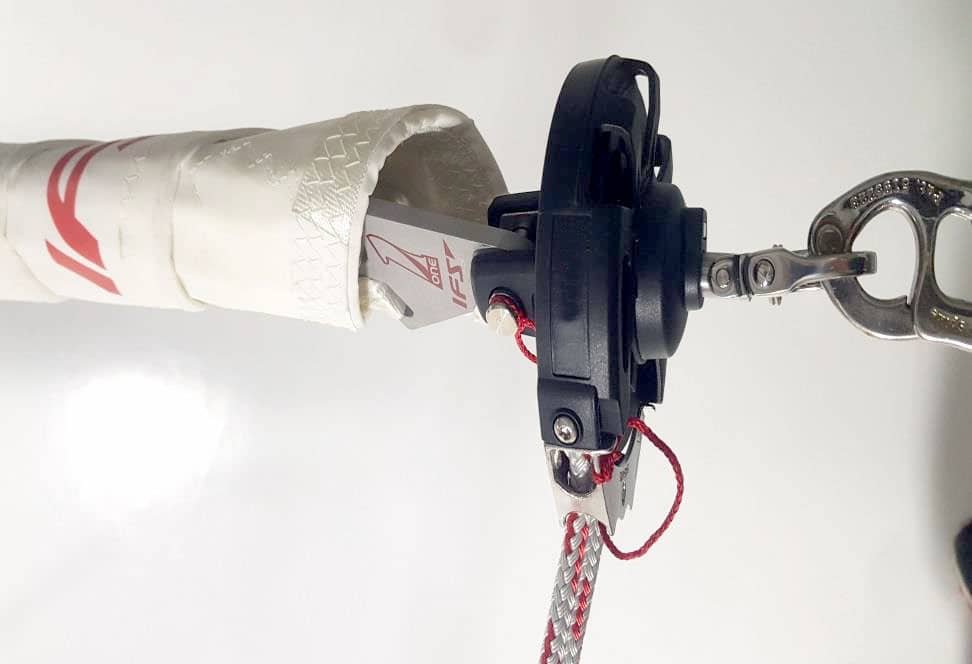
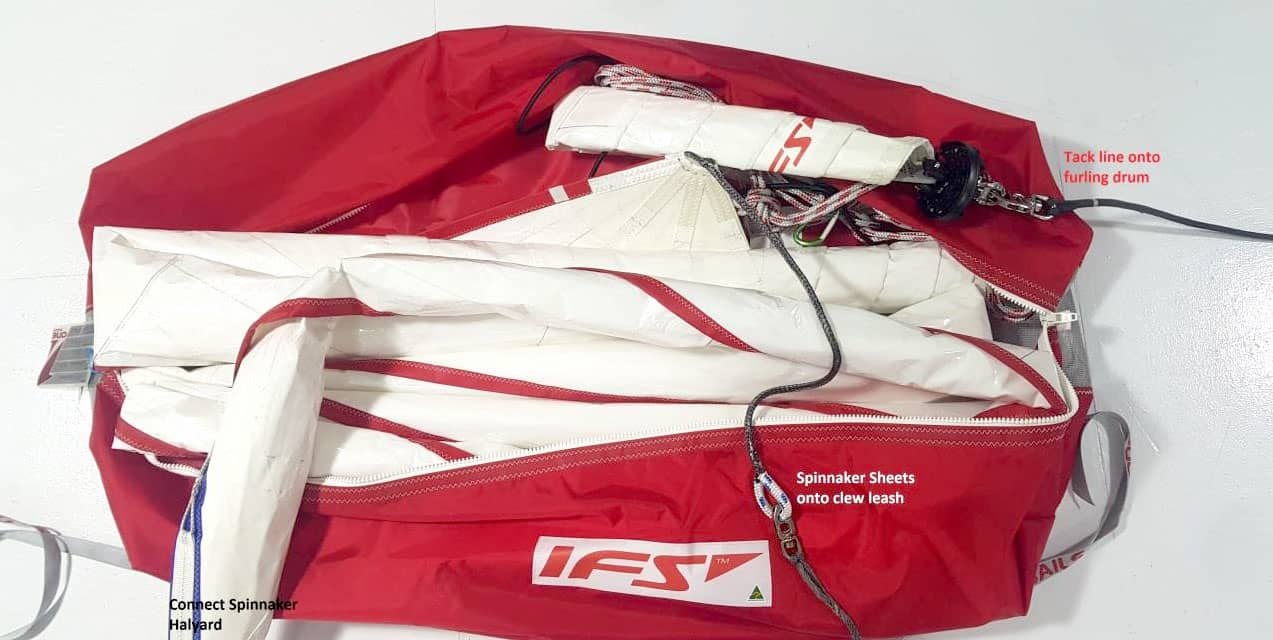
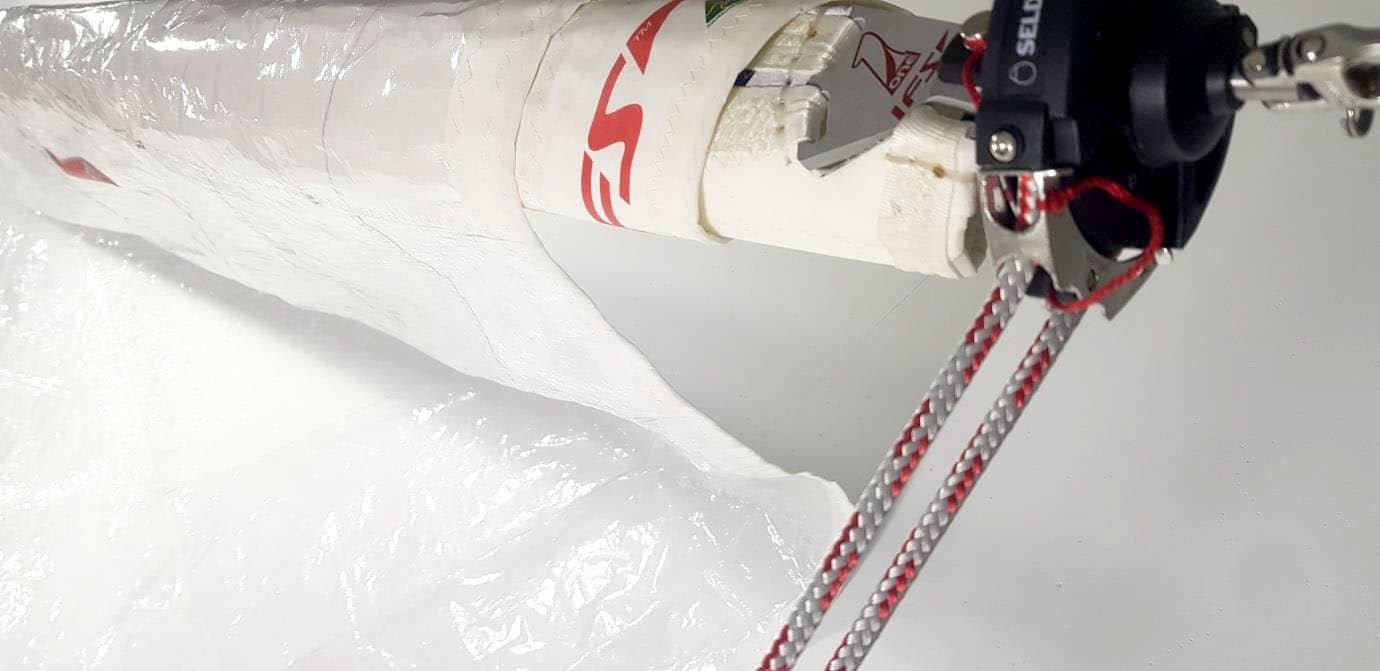
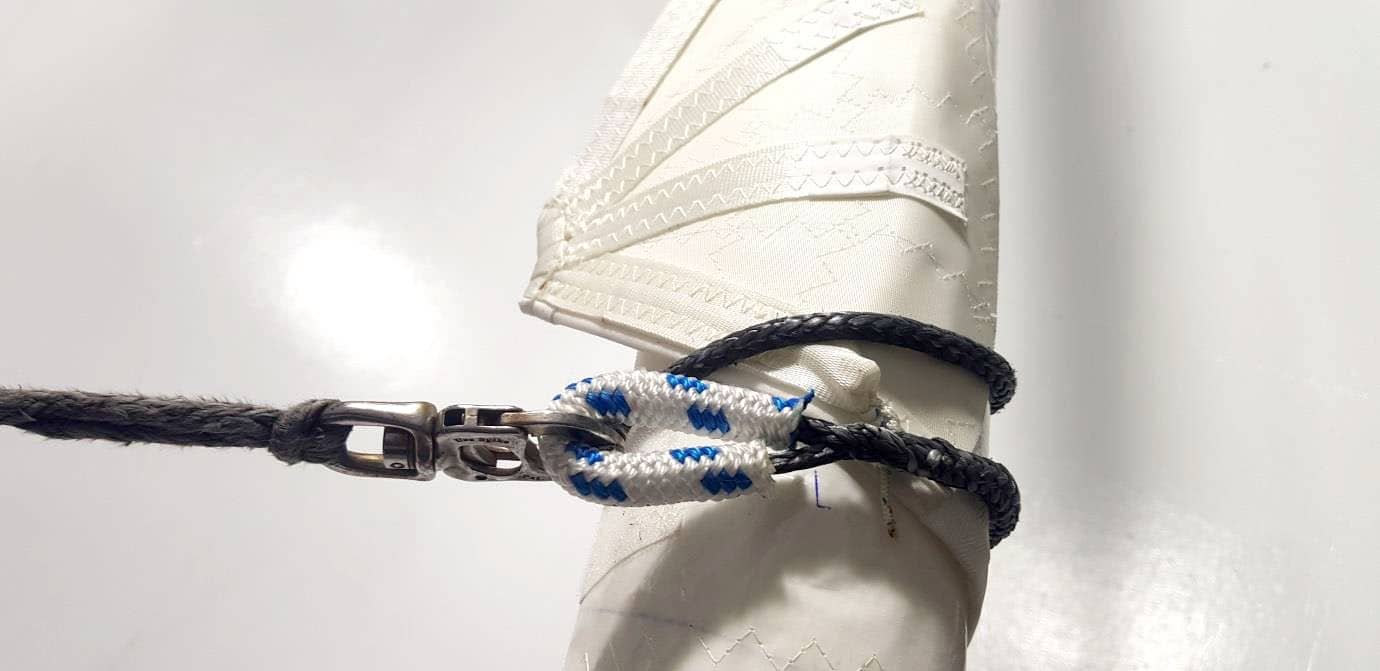
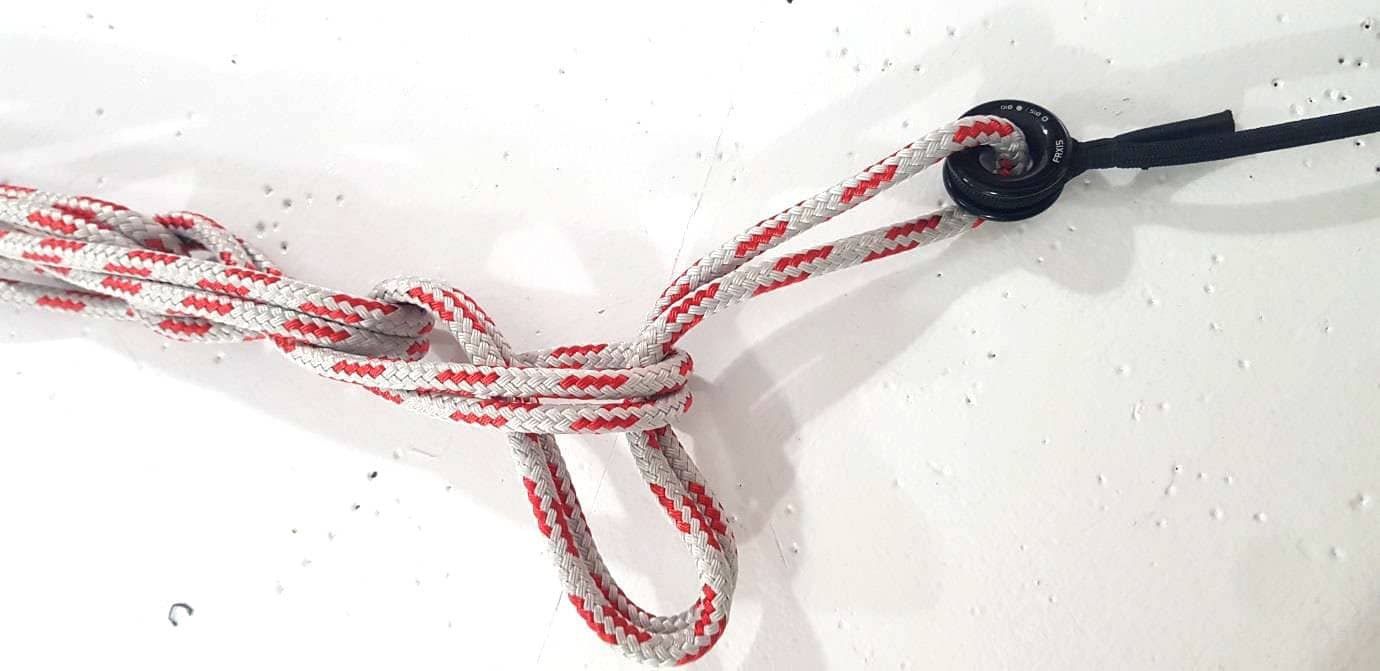
The endless furling line is fitted onto the furling drum. The fairlead and elastic system with Caribbean Hook at the end of the endless furling line is what keeps the system taught and tangle free. This is important in keeping the sail easy to deploy and furl up.

You will notice the furling line is packed in a ‘daisy chain’ which helps neatly store the length of the system. The daisy chain isn’t a knot – it will simply pull out as it loops onto itself, and is very quick and easy to re-do when packing the sail away.

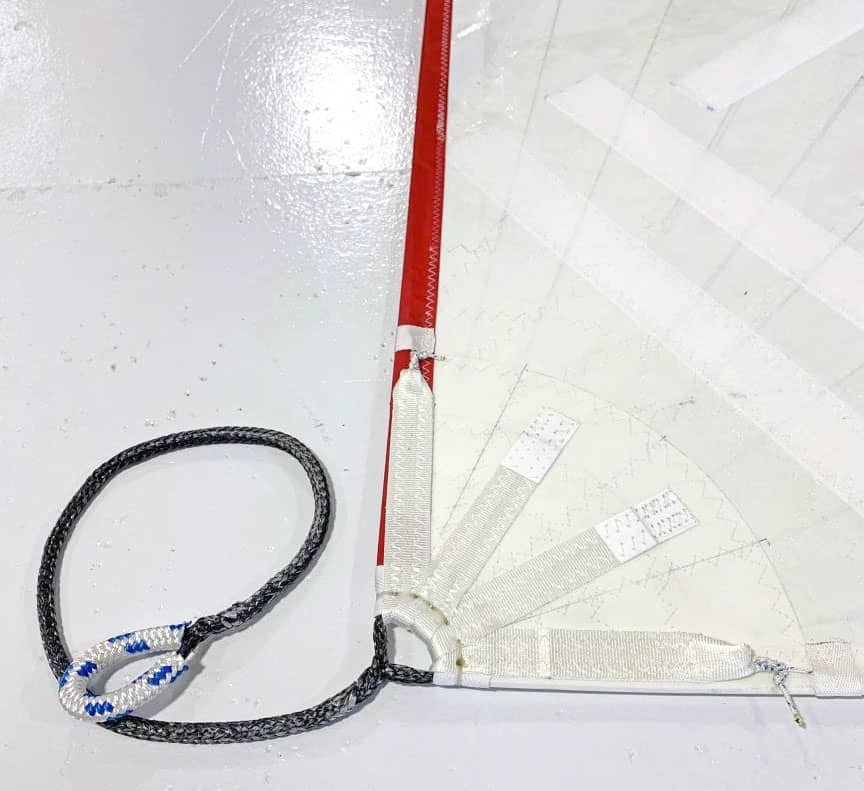
There are Velcro ‘catchers’ built into the clew of the sail. These close the sail when the furl is completed. It doesn’t matter which way you furl the sail up (clock / anti-clock wise) as they are fitted to both sides. However if you furl it the same direction each time it will be easier to furl in the future as the corners develop memory.

The clew leash is ready to receive your spinnaker sheets. It is important to use the leash as it allows you to easily disconnect your spinnaker sheets after use when the sail is furled up. There is no problem with furling your sail so that the leash winds around your furled sail.

Setting up your IFS sail

Connect all 3 corners of the sail to your running rigging:

  1. Head of the sail including head swivel to Spinnaker Halyard
  2. Clew Leash to Spinnaker Sheets. Set the sheets up for OUTSIDE gybe
  3. Tack of the sail including furler drum to Tack Line

Next

  1. Pull your tack line to send the furler and drum to your bow attachment.
  2. Run the endless furling line aft and secure the elastic system so the system is firm
  3. Hoist the sail and with at least 3 turns on the halyard drum give the sail a few turns so the luff tension is firm and there is no sag in the sail

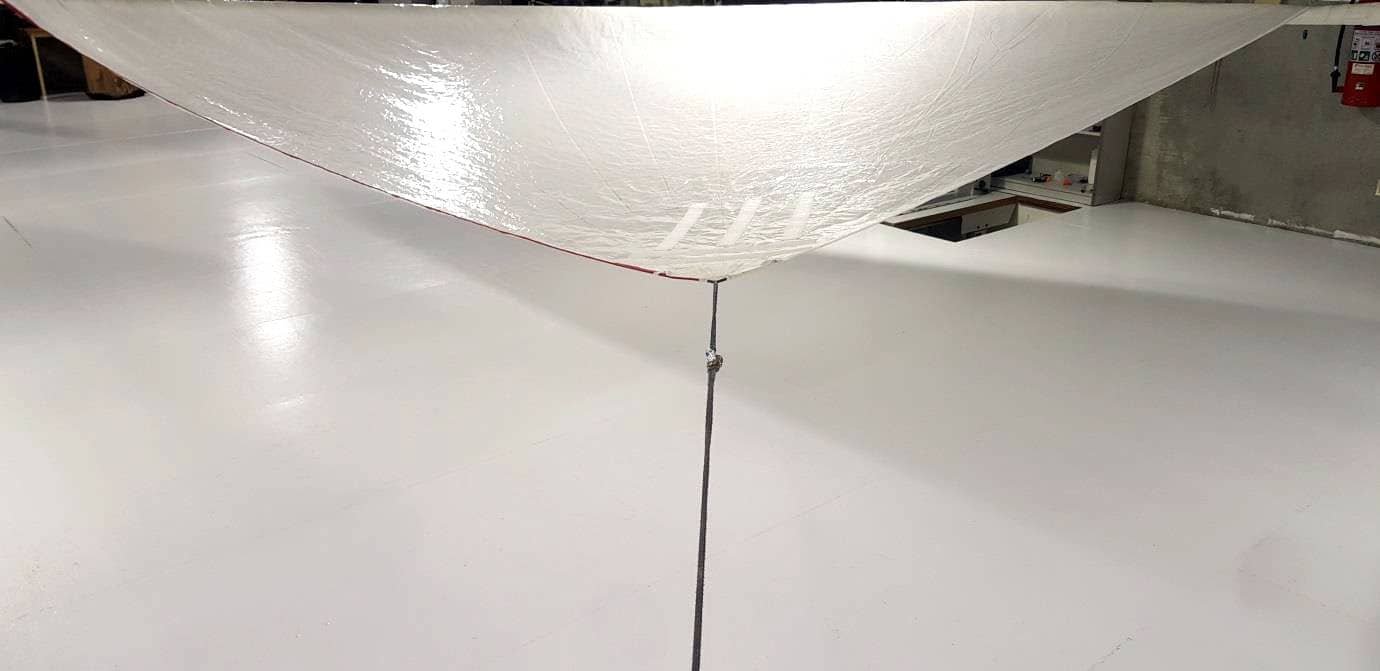
The IFS set up with the luff tight and the endless furling line ready to go. The luff must have firm tension setting for furling and deployment.

*Although IFS sails are designed to take significant tension, care must be taken to not over tension the halyard . These sails require less than 50% of tension of a torsion cable luff sail. Over tensioning may result in damage to the furler, fittings and sail

Deployment

Deploying the sail is as simple as pulling on the spinnaker sheet so the velcro on the clew release, and the sail will deploy. In winds less than 10 knots you can deploy the sail by pulling the sheet on with the True Wind Angle (TWA) at 90 degrees.

In winds over 10 knots it is strongly recommended to deploy at TWA greater than 120 degrees.

Sail Trim

There are many different models of IFS sails of which the designs are optimized for different purposes. For specific information you should consult your OneSails representative for how to get the most from your sail. As a general guide with all IFS sails:

  • When reaching or even sailing tight angles in light wind the sail is used like a code zero type sail - keep the luff tension tight for optimum performance. In tight reaching mode in light winds the mainsail will need to be on or above centreline with the traveller
  • When the TWA is 090 or greater either the halyard or tack can be relaxed a little so the sail assumes a better flying shape and the luff can project forwards
  • When used for deeper running you can ease the halyard down or the tack up and this will allow the luff to “fly” and with the sheet eased you be able to achieve lower angles. Remember - tighten the halyard before you furl the sail back up!

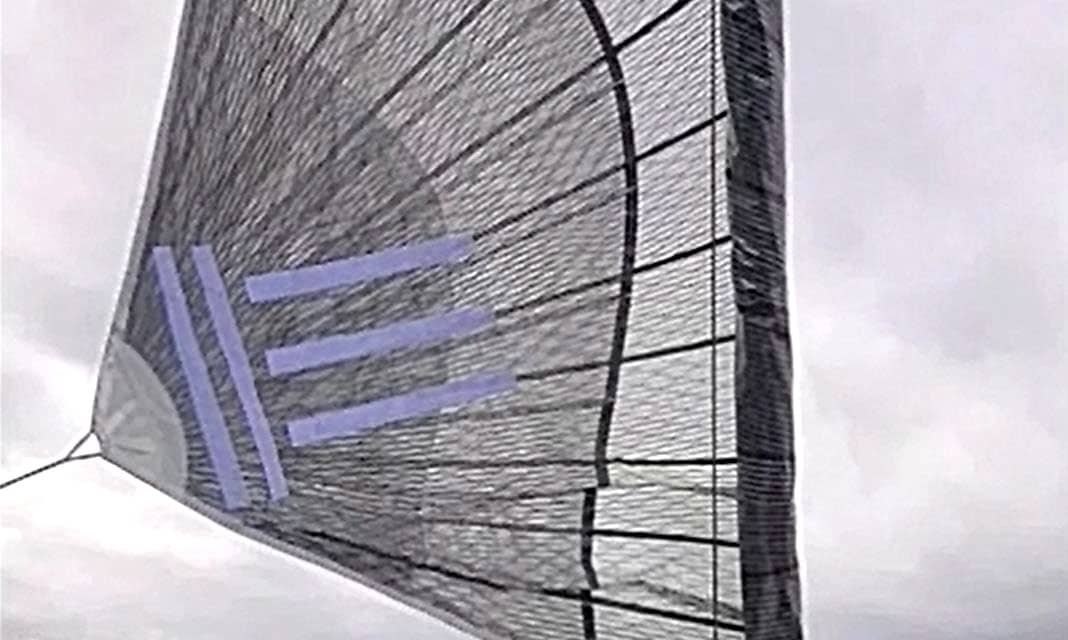
Luff tight – perfect setting for reaching (all IFS models) and upwind (Code Zero models) light winds....and necessary for furling and deploying.

With the tack (or halyard) eased the sail will fly and project forwards for better running performance.

Spinnaker Gybing

Rig the Spinnaker for outside Gybes (spinnaker sheet goes all the way around the outside of the sprit) or bow attachment. As the boat bears away ease the sheet continually so at the boat is dead downwind the clew of the spinnaker forwards of the bowsprit and the lazy sheet is being simultaneously pulled on. This is important as it will prevent the lazy sheet from going under the bow.

Hold the boat deep to allow the new sheet to be taken on and start the rotation of the sail to the new tack. Then bring the bow up slowly while trimming to suit.

The reason for the outside gybe is it is very low risk and so long as the sheet gets well eased before the gybe the sail can never back fill, which is the cause of mid gybe broaching in stronger winds.

Furling

This is the single most important thing to get right....a bad furl will make a messy deploy the next time you use the sail. A bad furl can even result in the sail becoming unfurled half way through your next hoist. Most importantly - ALLOW ENOUGH TIME TO GET A REALLY GOOD FURL!

A rushed furl almost always results in an imperfect furl.

  1. Make sure the luff is firmly tensioned
  2. Sail the boat at 150 – 175 TWA. Deeper sailing makes an easier furl!
  3. Start pulling on the endless furling line. You will see the drum turning
  4. As the furl starts a little tension is kept on the sheet as the sail is furled. This will assure that the leech gets a tight furl and won’t come unravelled. Remember – sail deep or motor sail to completely unload the sail... you must sail deep 150+ TWA to furl. Don’t be alarmed if the top of the sail doesn’t furl at the same time as the bottom – this is normal and will ‘kick in’ at some point when the IFS system torques
  5. You will see when the sail is furled the Velcro at the clew will capture the sail and you can completely release the sheet

IFS sails should not be left hoisted when they are furled where the apparent wind speed is greater than 12 knots as it may unfurl.

Starting the furl – simply pull on the endless furling line.

Controlling the furl – keep a slight tension on the sheet so the leech furls tight.

Finishing the furl – the clew Velcro will capture the furl. It is ok for the leash to go around a few times

Packing the sail away

  1. Lower the sail using the halyard after use. Always lower it on the windward side as it is easier to manage. If you have a jib up – the sail will slide down inside the jib which will act as a ‘catcher’
  2. As the sail comes down it is easy to ‘snake’ straight into the bag
  3. Disconnect the sheets from the clew leash
  4. Disconnect the Tack and furling line
  5. Daisy Chain the furling line and zip up the bag

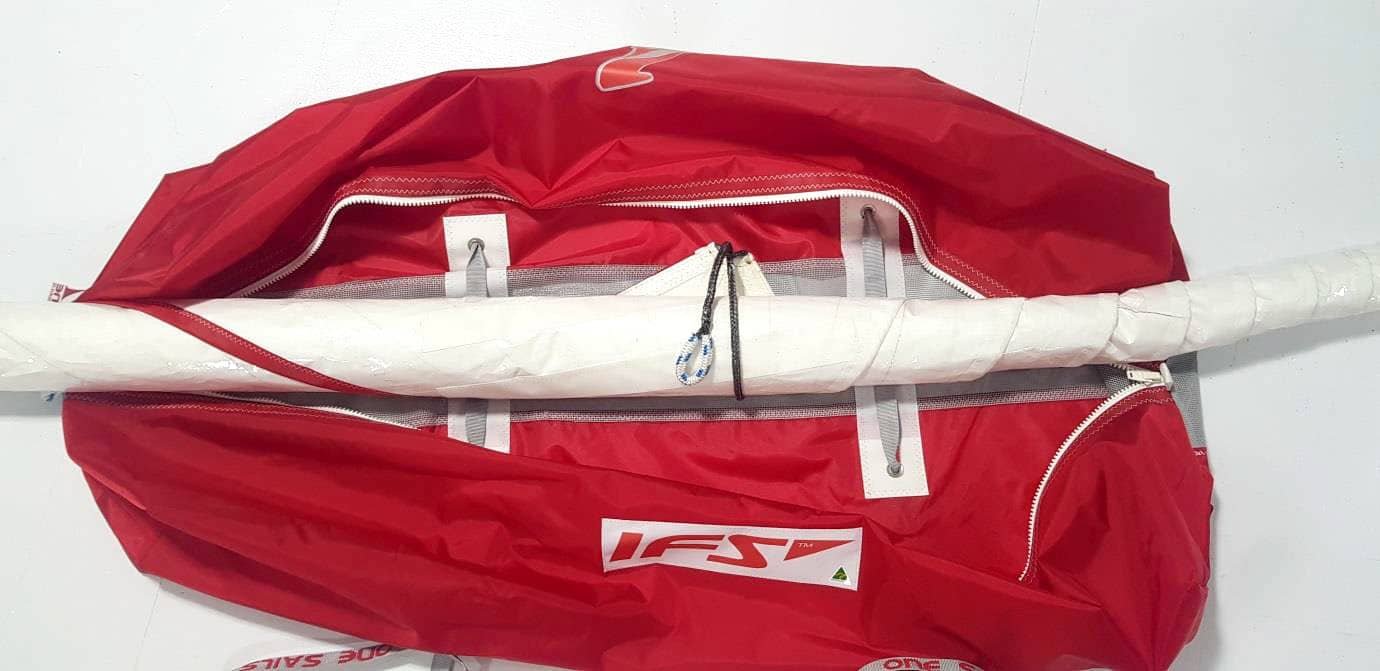
On lowering the sail – locate the clew in center of the bag as the halyard is lowered

On lowering the sail – snake the top of the sail in one half of the bag then disconnect the head

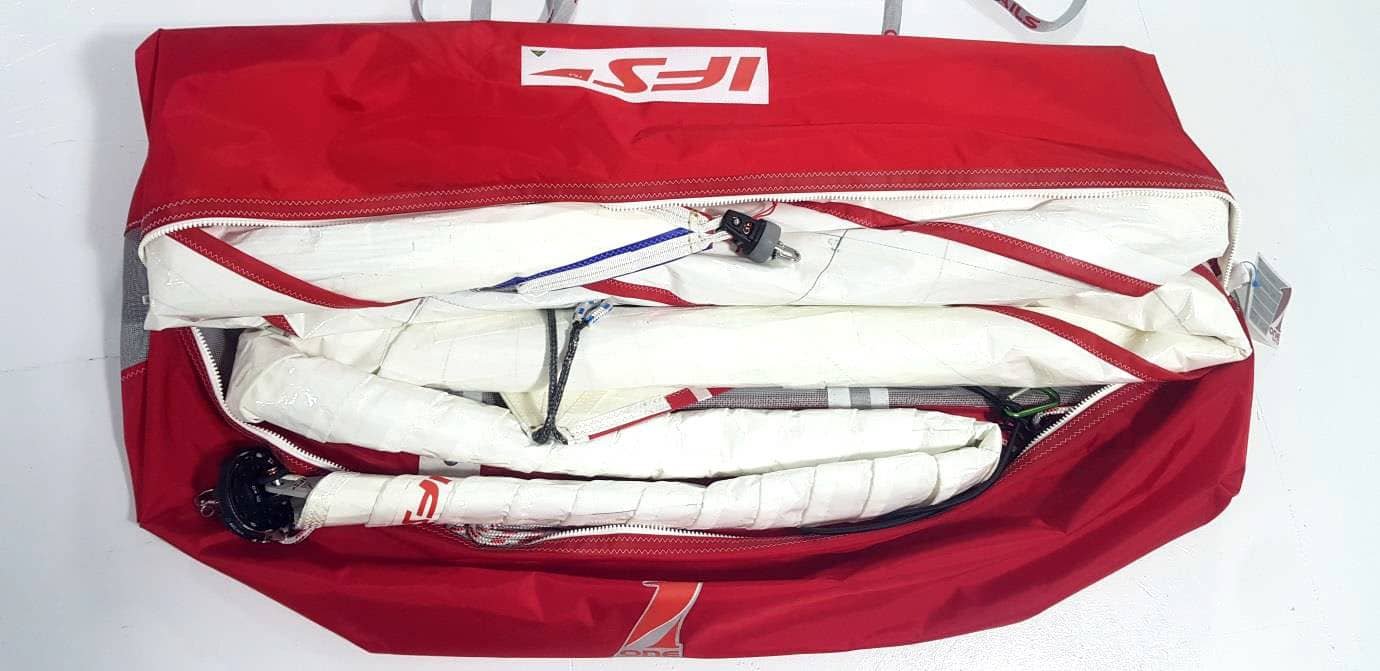
When lowered – release the tack and snake this part of the sail on the other side of the bag. Now you have all 3 corners neatly stowed ready for the next use!

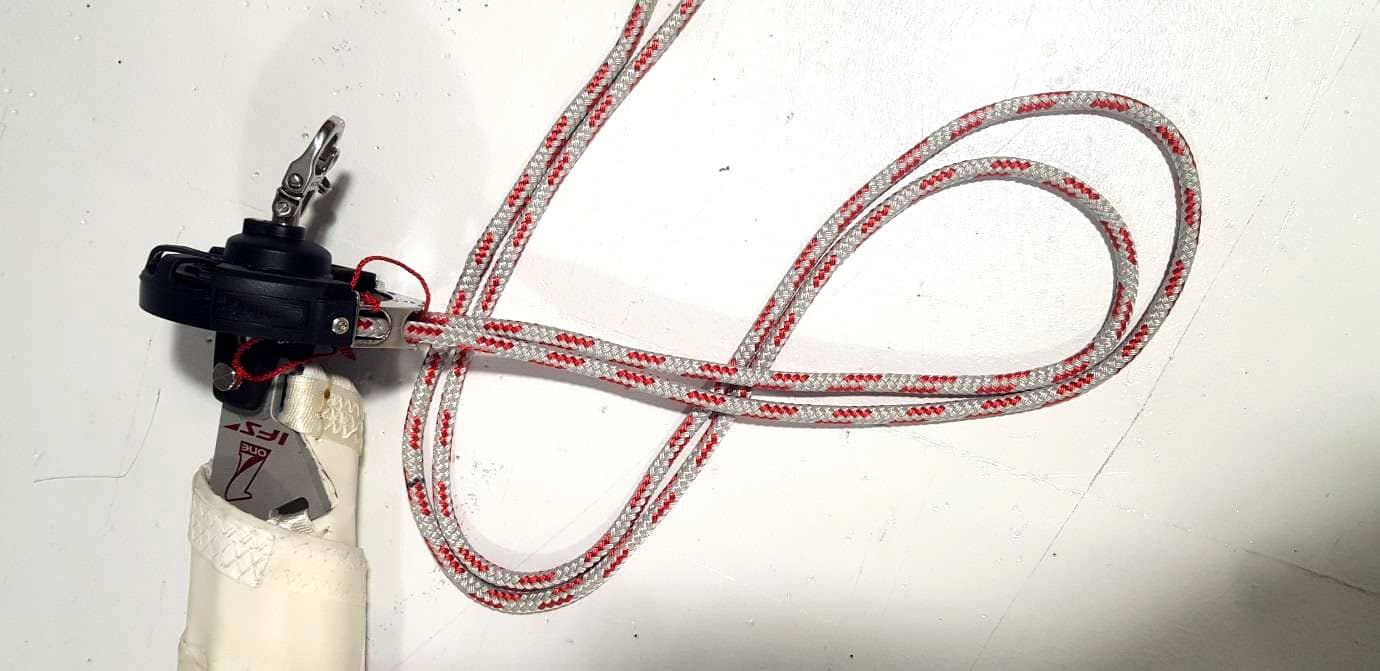
To start the ‘daisy chain’ begin the first loop close to the furler

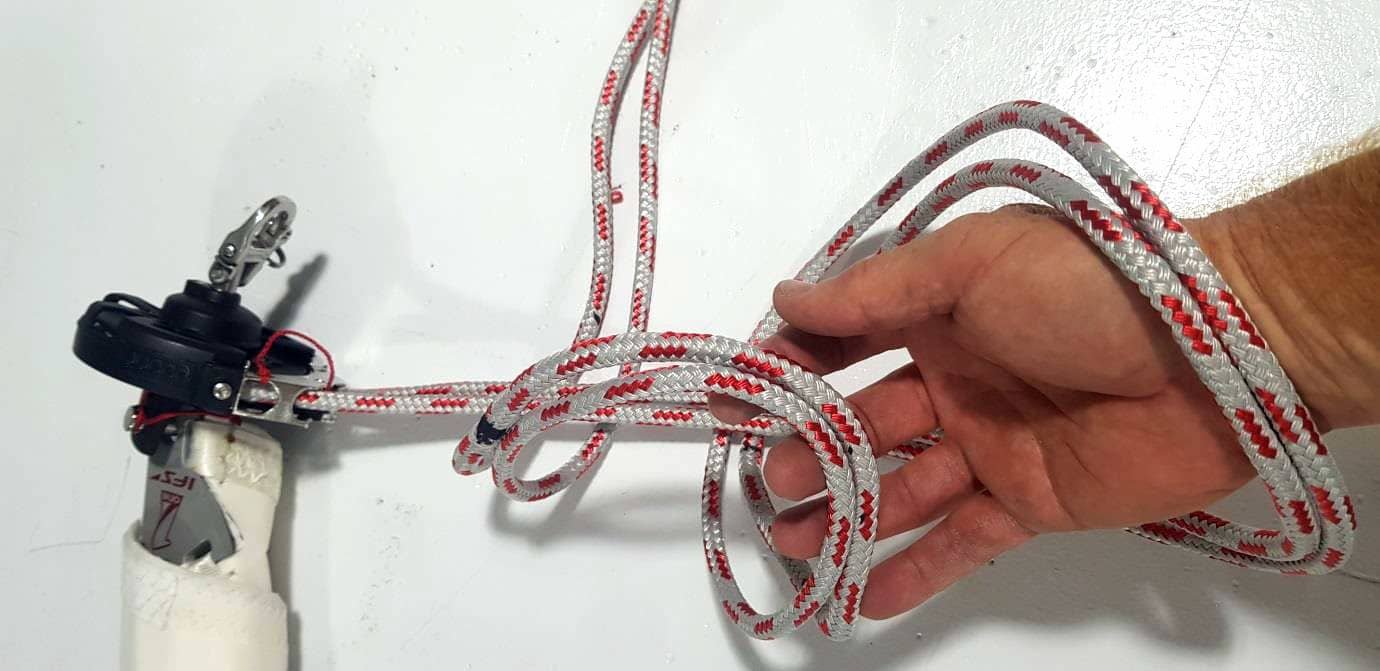
Pass the tail through the loop and pull

Again grab the tail and past though each loop that is created

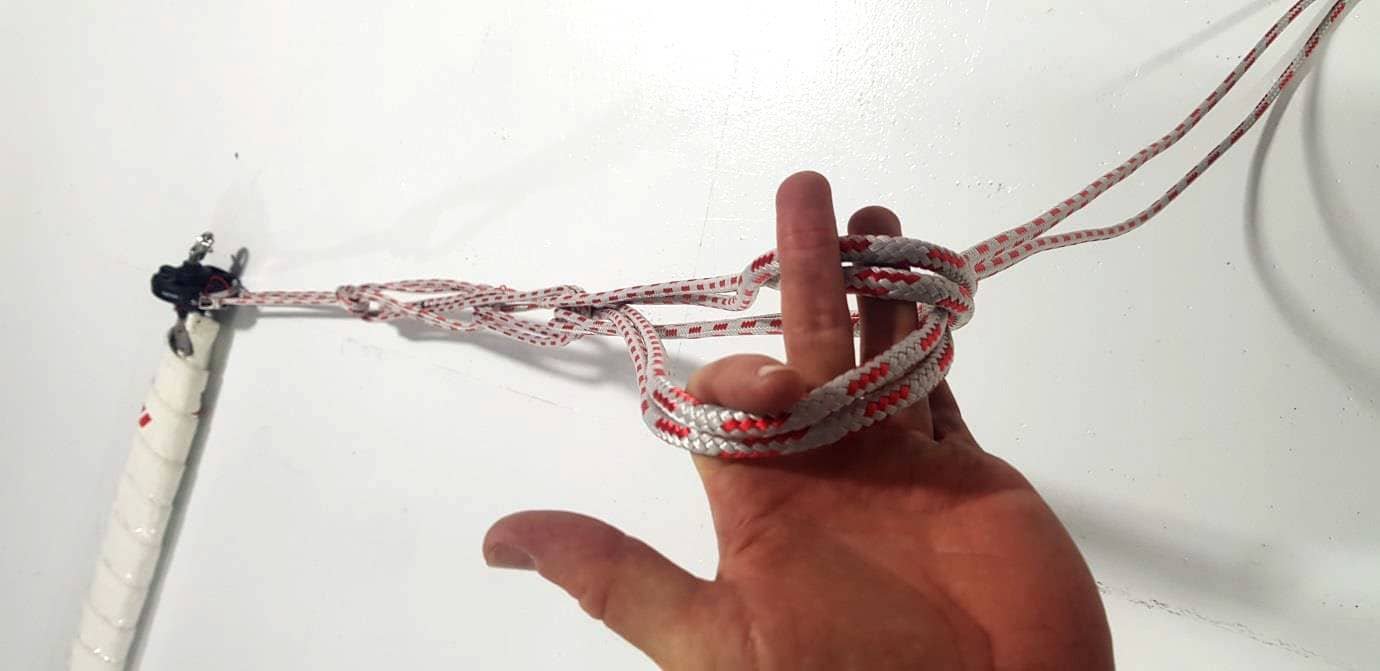
Repeat until you reach the end of the furling line

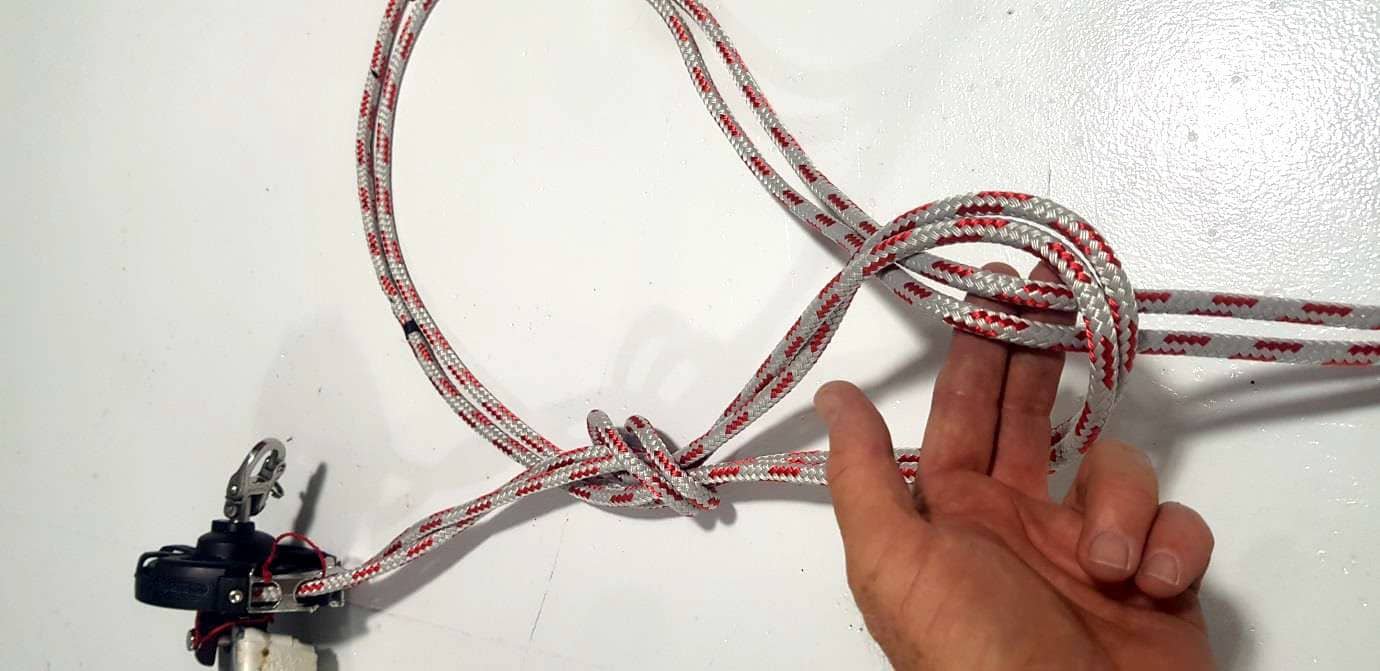
When you reach the end of the line, chock the knot by pushing down against the final loop

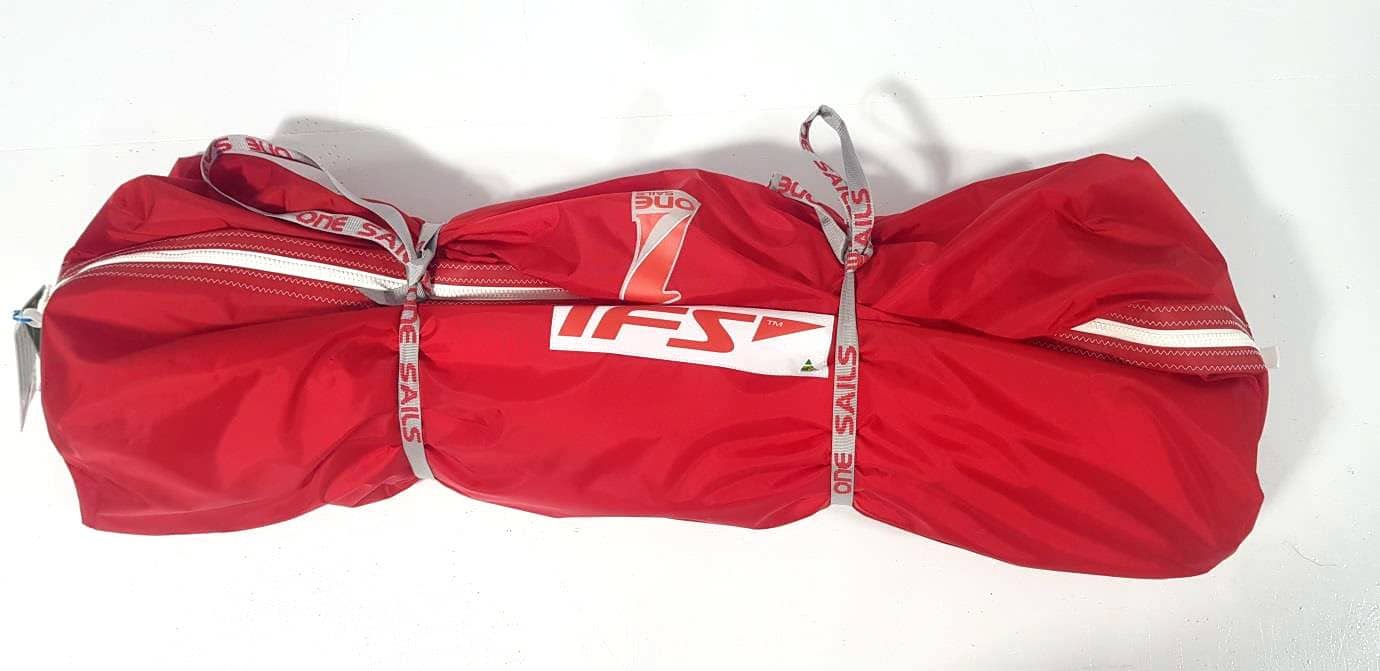
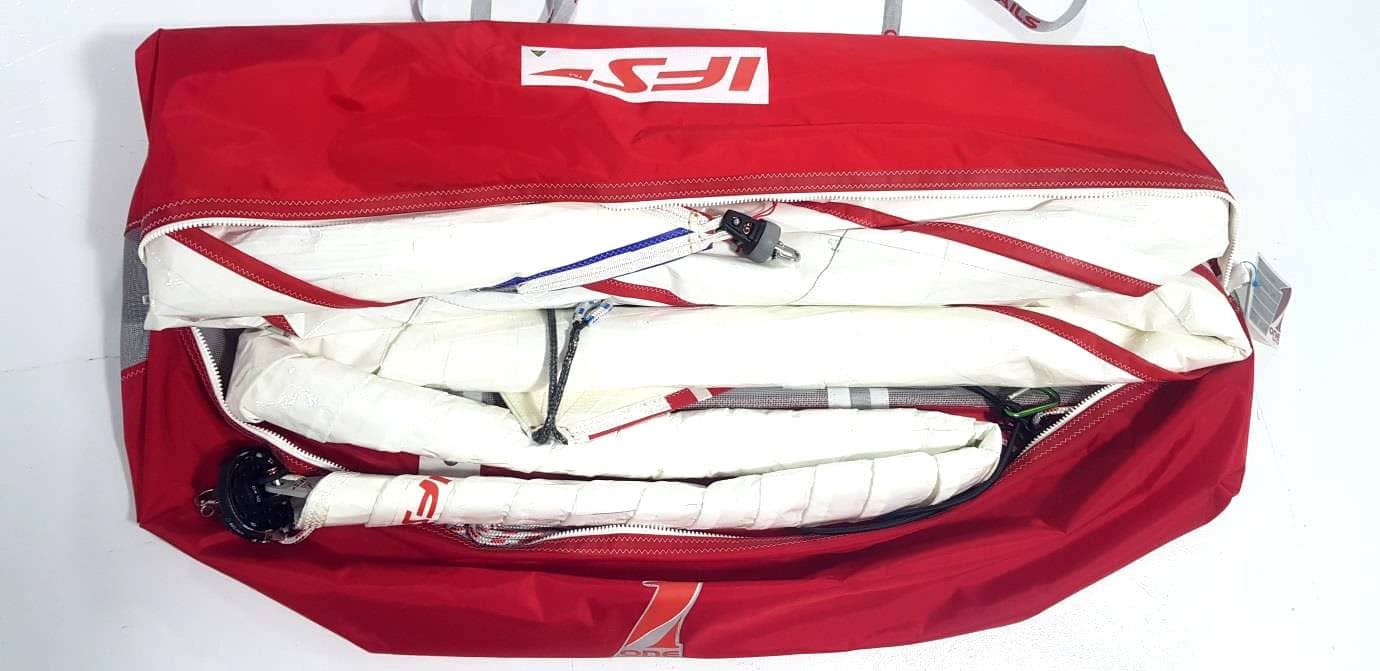
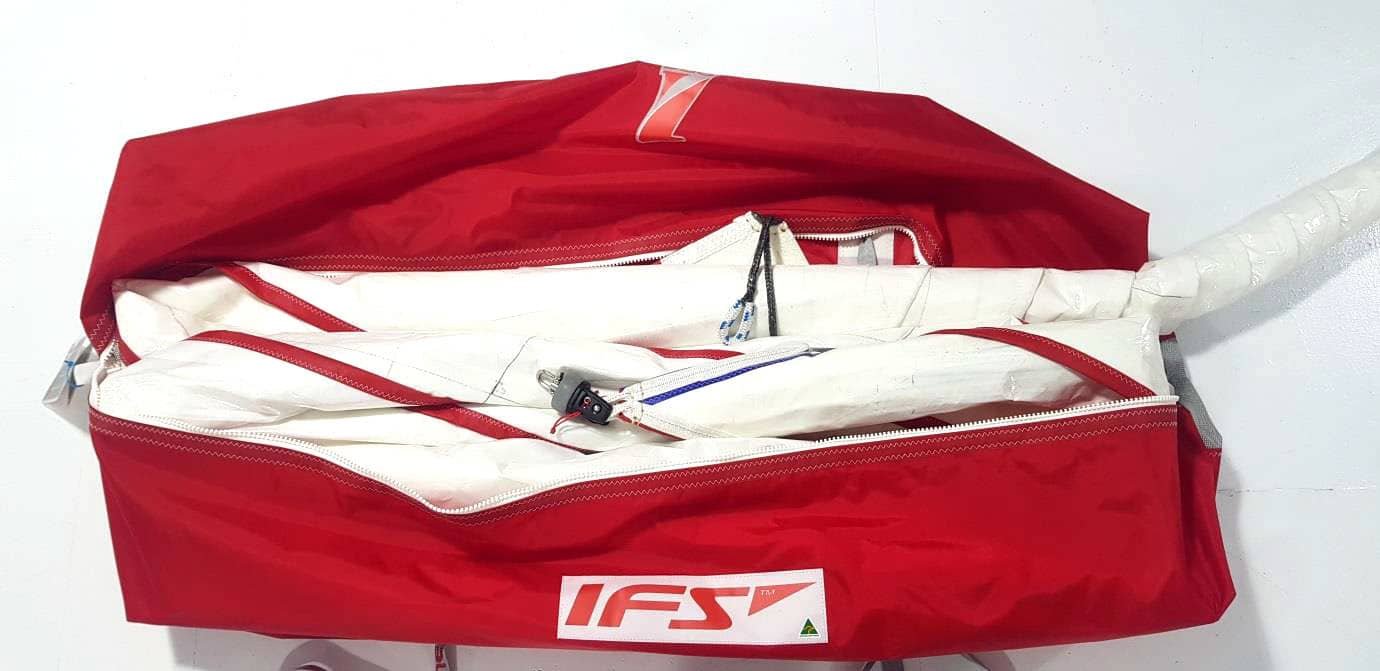
When complete, zip the bag up and tighten the webbing straps so the sail is contained firmly in the bag. This will ensure the furl stays tight for the next time it is used

What if it all goes wrong?

  1. Sail the boat dead downwind
  2. When the sail is hidden behind the mainsail and wind is removed from the sail, pull the sheet on to access the foot of the sail
  3. Grab the foot and start to lower the halyard, then retrieve the sail as you would a traditional spinnaker
  4. Disconnect the corners and stuff in the bag and relocate the bag to a more secure location
  5. Out of the wind, you will need to remove the sail from the bag and untwist the sail
  6. One untwisted, pack loosely in the bag as you would a traditional spinnaker
  7. It is important that when you re-set the sail, you attach the furler and endless line as normal
  8. Re-set the sail as a normal spinnaker. Make sure you are sailing deep when you re- hoist the sail!
  9. With the sail flying, sail your normal angle and tighten the luff
  10. Furl the sail as per previous instructions

If in doubt or you need assistance please contact your friendly OneSails representative!

N.B. Not all the fittings and accessories depicted in this guide could be part of the standard dotation of the sail.